
- How do your images look so warm/bright when your subject is backlit?
- How do you get sun flares/haziness to your images?
- How do you post process your images?
Just a disclaimer, I am in no way trying to say that the way I do things is the way you should or anyone else should. Take this all in but put your OWN spin on things. I am also not saying these are the absolute correct ways to go about these techniques. They are just my own and how I achieve these results. Others may do things differently and that is quite alright with me! :)
Let's start off with Backlighting & Sun Flares, which coincide together - at least for me they do!
BACKLIGHTING + SUN FLARES
I don't know who made up the rule but I've been told by/asked by people why I shoot into the sun..."Isn't it against the rules?" To me, there really aren't set "rules" for photography and I like to break them if and whenever possible. I think that it's something that's happening more these days and is something that is almost becoming a style. Maybe I'm wrong, but I love it!
98% of the time I am always shooting into the sun/back lighting. When I have a super sunny day, I love to play with sun flares and making the images hazy with the glow from the sun. First things first with sun flares - it's nearly impossible at high noon. I always do the majority of my shoots the last 2 hours of daylight, which will bring the sun directly behind my models. That's a big factor: Time of day when you're shooting. Sunrise or Sunset. You choose! I prefer sunset for obvious reasons!
Next, I usually take the photo at a slightly lower angle and look up at my model. Don't do this too drastically and also make sure their chin follows you down, so you're not looking up their nose ;) I always shoot on Manual and I usually cannot see my meter when I'm taking the shot. My precautionary steps at this point are to:
Next, I usually take the photo at a slightly lower angle and look up at my model. Don't do this too drastically and also make sure their chin follows you down, so you're not looking up their nose ;) I always shoot on Manual and I usually cannot see my meter when I'm taking the shot. My precautionary steps at this point are to:
1) Shoot in RAW (I can go back and make detailed adjustments to expose properly if it was too bright/dark)
2) I also usually take my shutter down three stops to assure I have my meter close to where I want it.
3) Use a reflector! I own one but haven't honestly used it in months! It does help though! Here is a photo of mine. It is a 5 in 1 reflector which offers plenty of variety which can even help block/diffuse sunlight as well!

You will see the flare thru your viewfinder and can usually tell how it will look. I just love when it slightly pops behind the back of their head and then you get the soft hazy look that flows into the actual flare. It's gorgeous!
Maybe it's something I just grew into, but I feel like it's very easy to spot a good "puddle of light" in any location. You'll just know it when you see it.
Another key point to think about when backlighting is what type of lens are you using? My lenses offer a LOT of light to come thru which definitely helps the process. I use a 50mm 1.4 for any and all of my portrait work. It's a perfect focal length and allows in so much light, plus the bokeh is to die for!
Now sun flares are fun, but bokeh is even better! When you combine the two together...Mama Mia! It's amazing! Bokeh is simply just the blur of your background. If you want some great bokeh, always look for contrast. I love when its a tree against a bright sky or in a nice shaded area with pockets of light popping through. Always study your surroundings. Bokeh can come in all shapes and forms. Some is butter and soft, while other images have more definition in the blur. This all comes back to what lens your using! I seriously recommend the 50mm 1.4 or something close to it! :)
SHOOTING IN RAW
I'll keep this segment short because I have a lot more to say on other topics ;)
I used to be terrified of shooting RAW, literally terrified. I didn't know what it was or how to even go about it. One day, I just decided I would try. I suggest if you don't already, you go switch your camera into RAW mode as soon as you're done reading this!
What is RAW?
RAW is literally what it sounds like - it's the complete raw version of your image. It does not do any automatic changes to your file as a jpeg would. It also allows you to really go in deeper into how you edit your photo. RAW is also a lifesaver for me when I am shooting sun flares! *More details in the post processing section*
POST PROCESSING
Ah, my most asked about subject. I still don't know why either BUT I will give you guys my best breakdown I can! :)
These images also coincide with the topics mentioned above...See how smart I am ;)
Let's go through this first image of Meghan. It was shot with a Canon 5d Mark II and a 50mm 1.4 lens. This image was shot with maybe 15 minutes of daylight left. Shot in Manual at f/1.4, 200 ISO, and shutter speed of 1/2500.

SOOC image isn't actually all that bad. I like that it's darker and has a mood to it. Not all images with sun flare need to be bright and bubbly. This one just added an extra sense of atmosphere to the photo. Serenity if you will :)
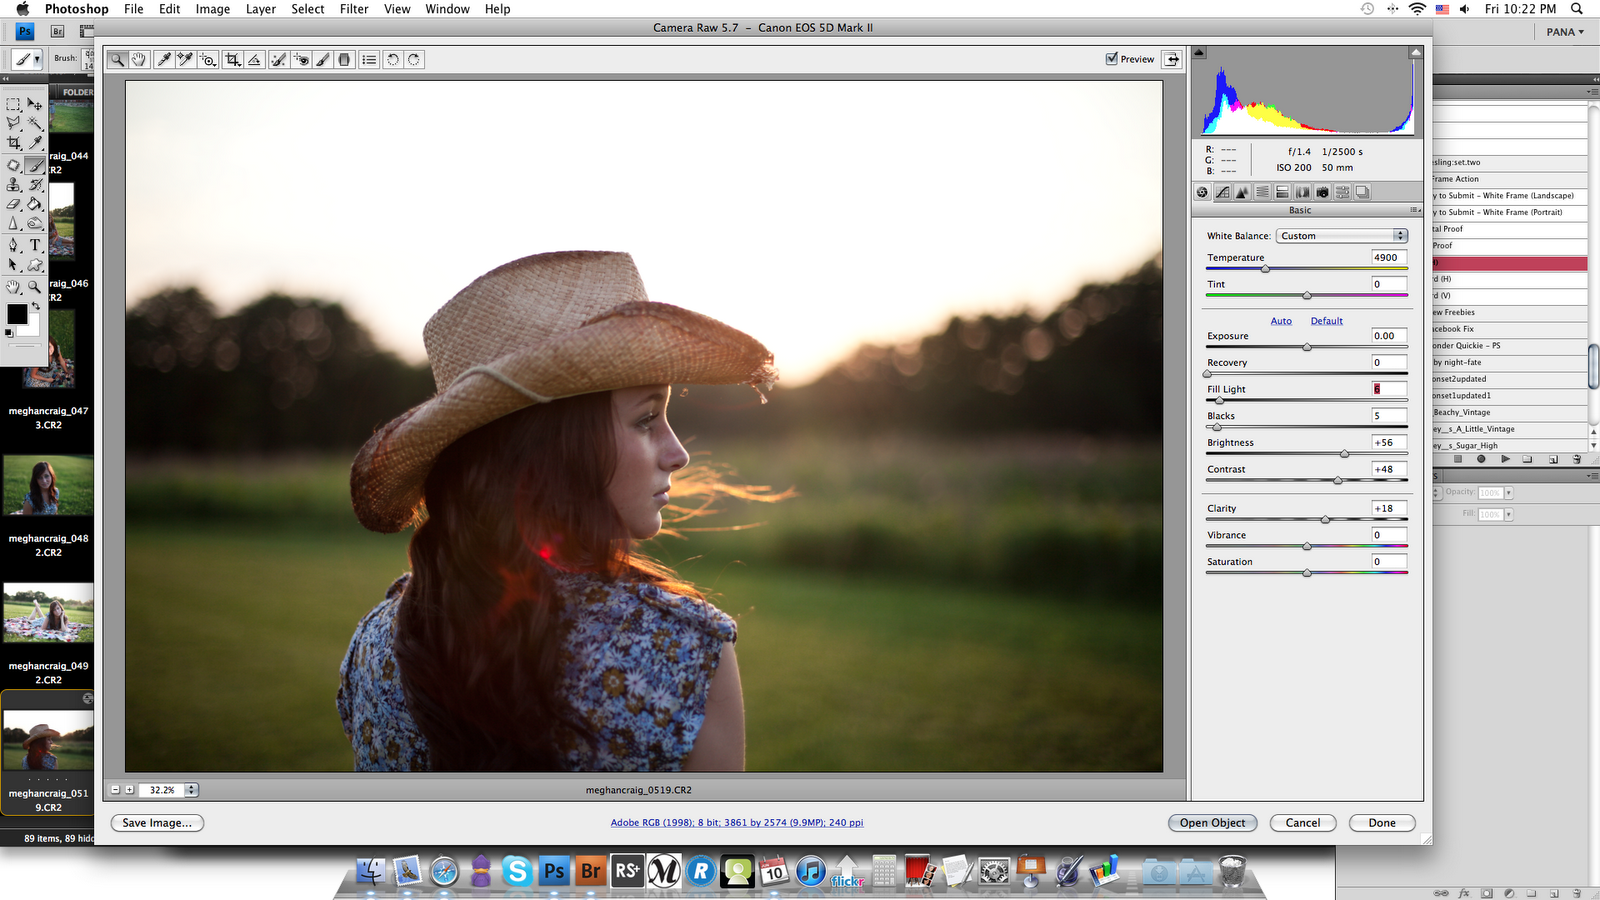
Above image has basic RAW edits including contrast, clarity, brightness and custom white balance. Another favorite tool of mine is the recovery tool. Sometimes, I have blown out my highlights and they need to be brought back down to reality. Use the recovery tool to do this! It's a lifesaver!

The next step was using Florabella's Luxe Collection (Ambrosia) with minor adjustments to brightness. I use Florabella in my dailywork flow and she has a wide array of different action packages to choose from. My favorites are Luxe and Luxe II http://florabellacollection.com/

Finally, I used Jordan Voth's "Foggy Tones" action to taste on top of the image as it's "top coat". I use Jordan's actions for a LOT of my images as their finishing touches. Check him out: http://www.jordanvoth.com/
------------------------------------------------------------------------------------------------
Now onto an image that is a bit more profound in the "hazy" aspect. I actually took it this evening! It is also of my very gorgeous boyfriend who was so kind to model for us! ;)
This image was shot at about 6:45pm with the sun setting at 8:25pm, this was about 40 minutes left of sunset. Image was shot using a Canon 5d Mark II and an 85mm 1.2L lens (renting it!) THIS lens is a dream. No joke!
Settings on my camera: Shot at f/1.2, 125 ISO, Shutter speed 1/3200.
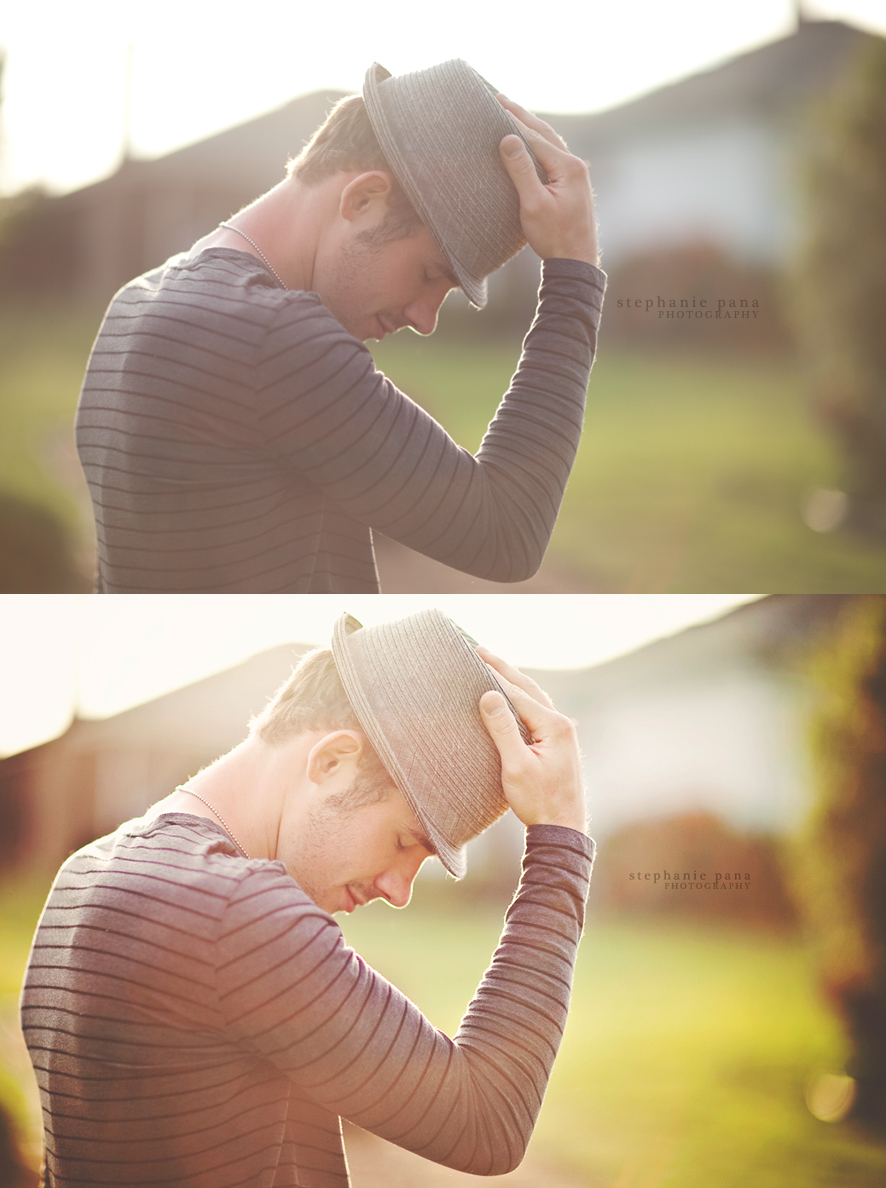
As you can see, SOOC image is VERY flat and grey. That's okay though! We'll fix it! :)
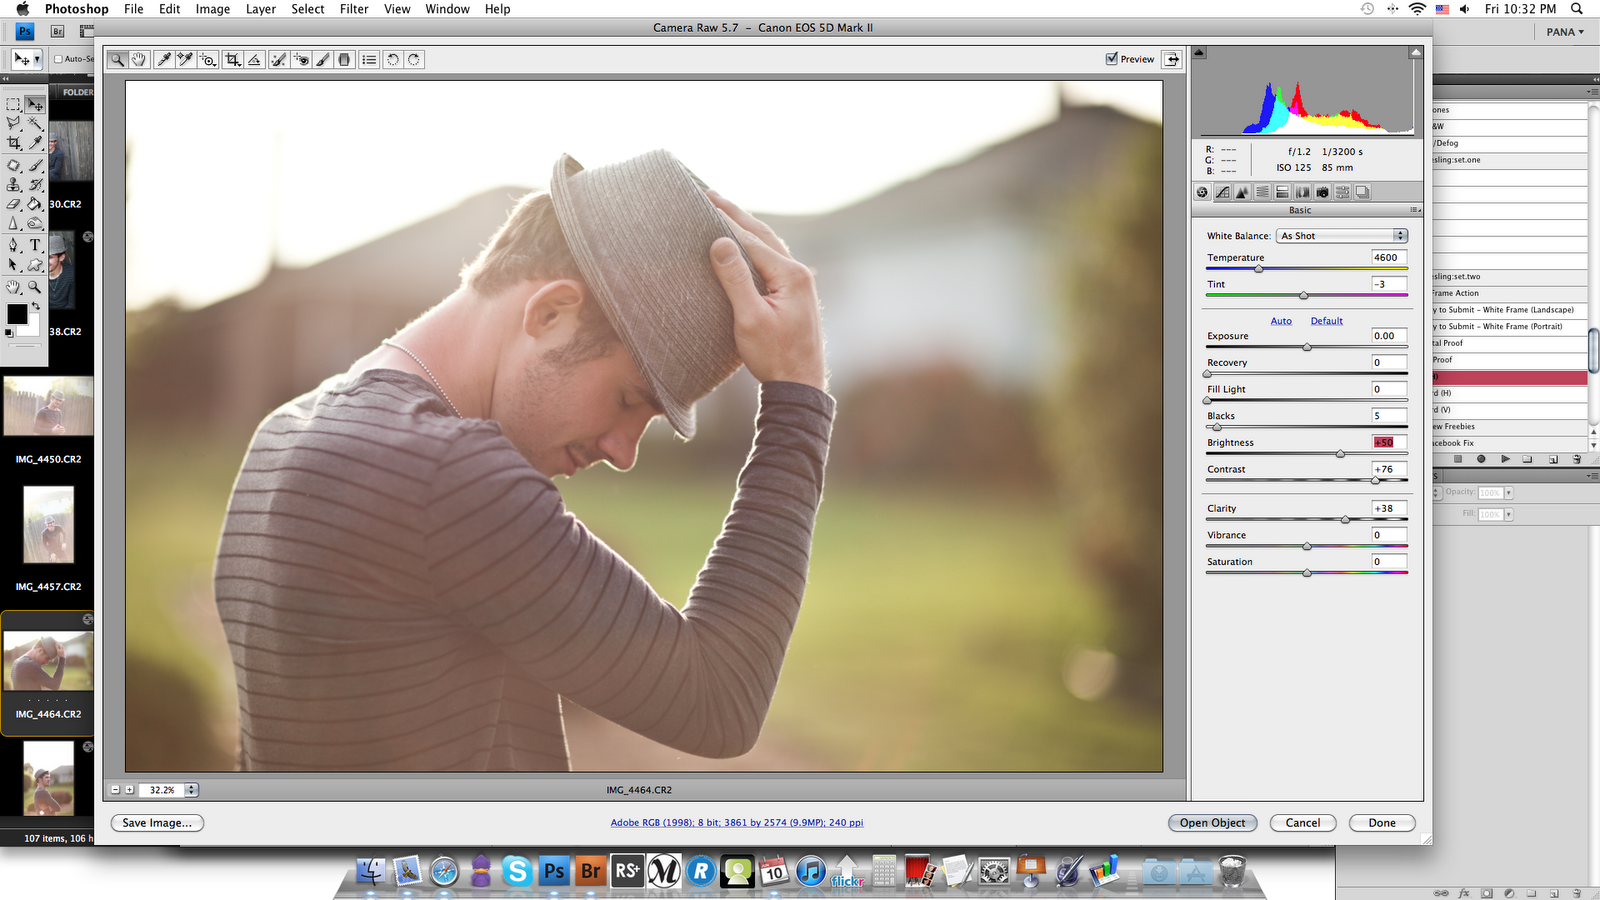
Once again, basic RAW edits with LOTS of contrast since it was extra hazy, clarity and that was IT! Already a big difference.
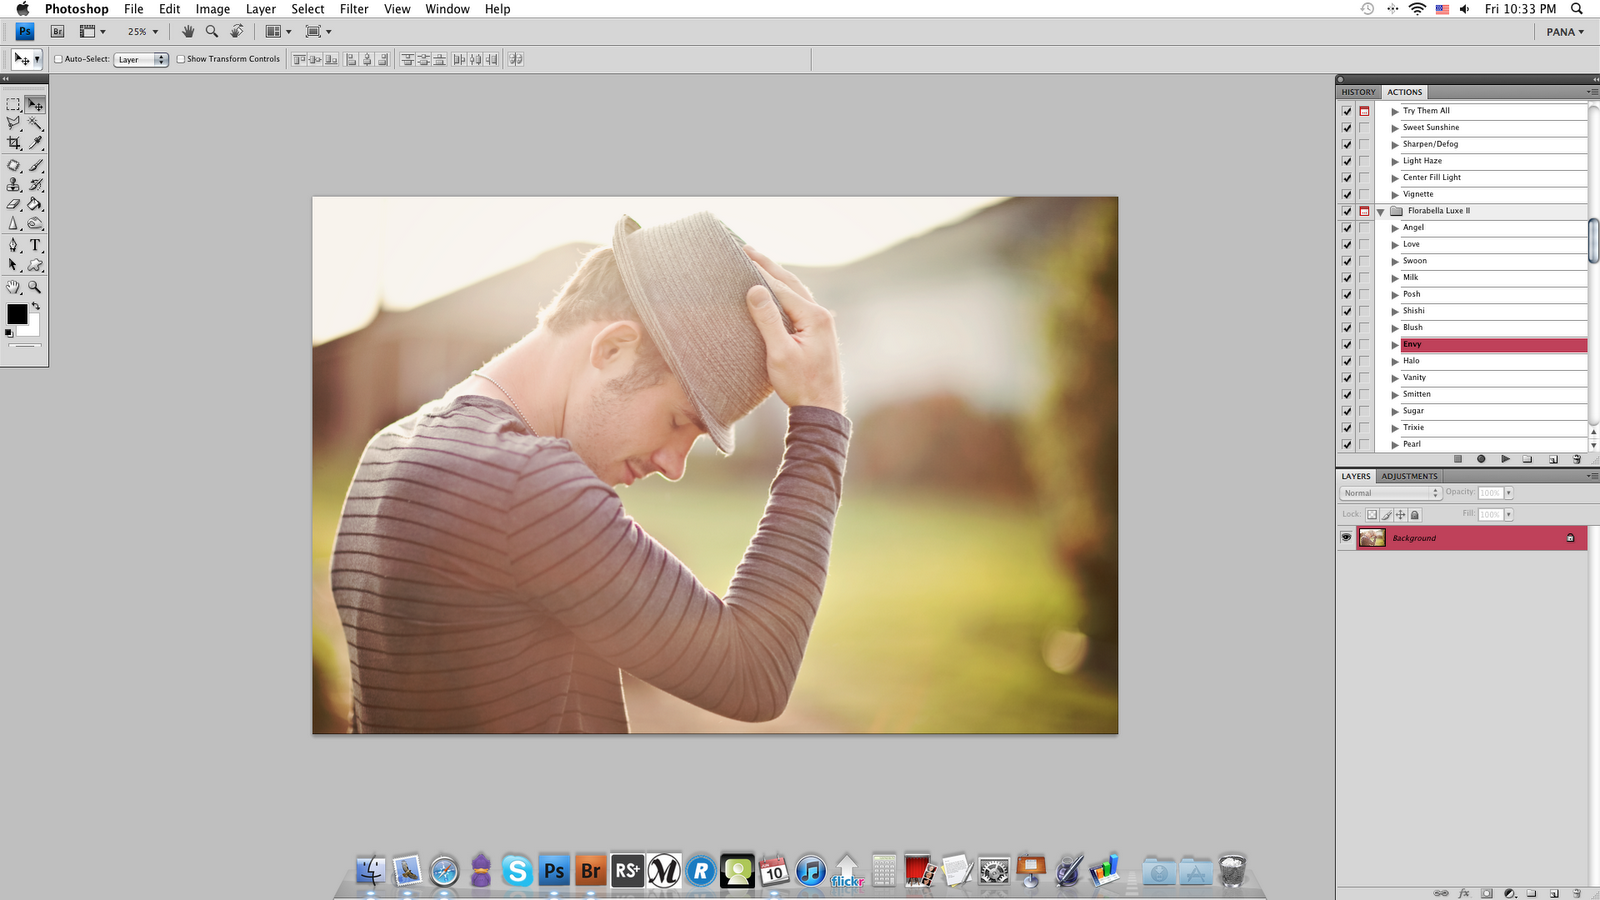
With this particular image, I once again used Florabella's Luxe II (Envy) and changed a few things to better my liking of the photo.
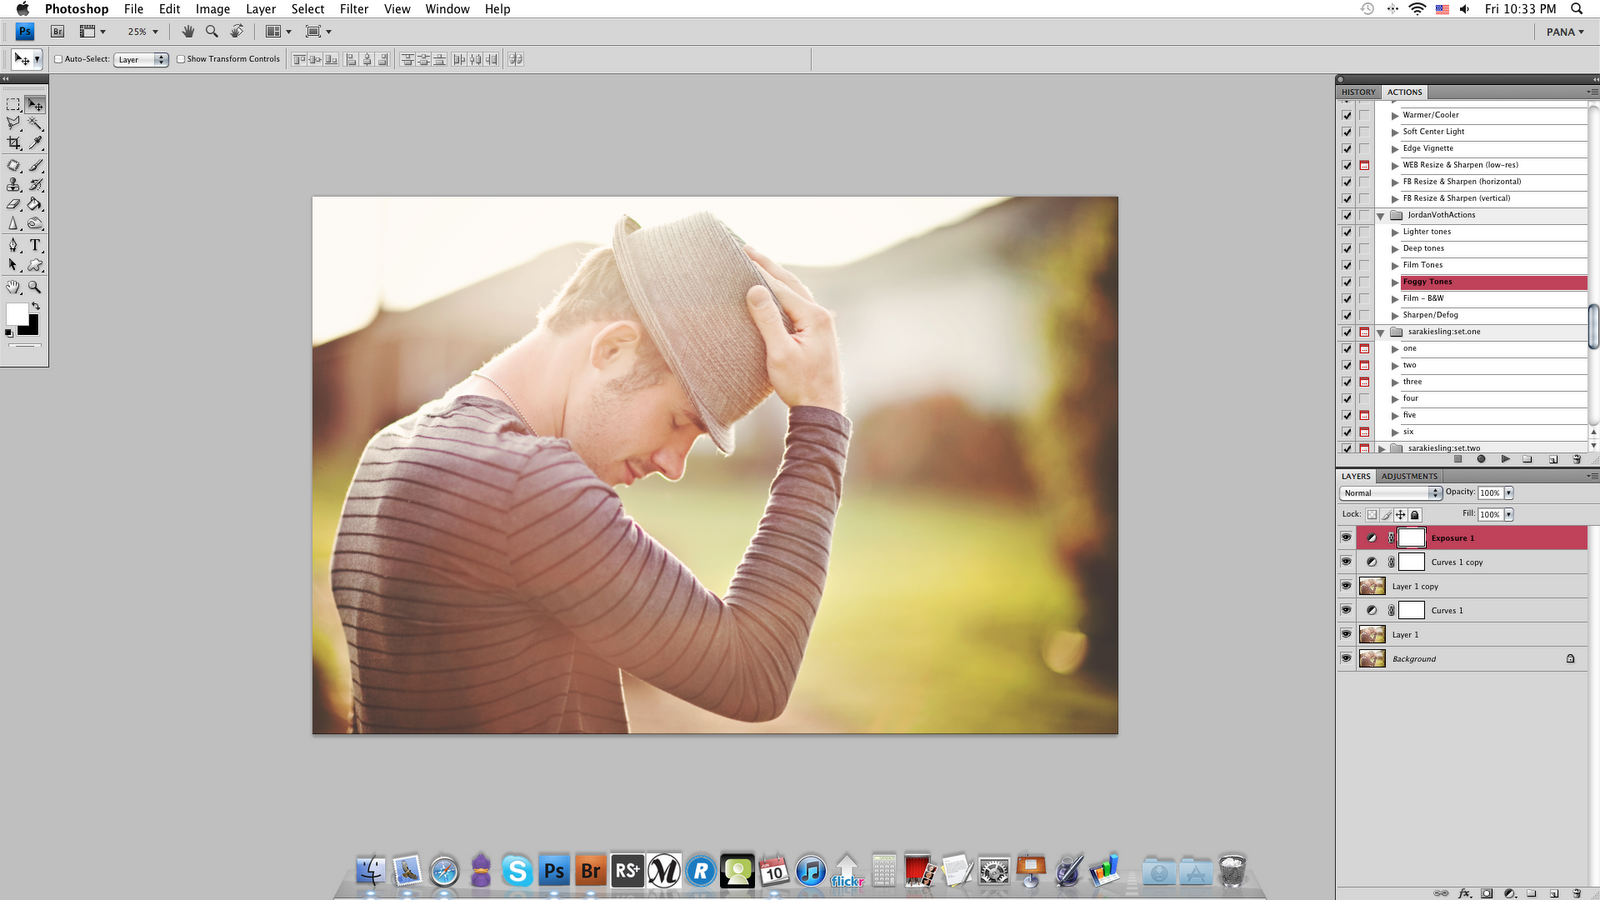
Once again, I used Jordan Voth's "Foggy Tones" action on top of my photo to add that extra something that it needed!
See how simple was that! All of these actions are so wonderful and I have to thank their creators for allowing us to use them in such a manner. So many incredibly talented folks out there. I in now way can ever take full credit for the way I edit my images because these photographers have saved us all the extra step. Don't forget though, use things but in your OWN way. It's hard to stand out, but when you do, people make note of that and it'll take you far!

Ahhh! I feel so good to have got that off my chest! As my lovely boyfriend is demonstrating the exact feeling ;)
I really cannot thank you guys enough. I hope to do more posts like this for you because you deserve it! Keep the continued support and remember to always be yourself in this business. What will make YOU stand out?
Hugs to all!
SP
Thank you so much for posting this!!! I love when photographers share their tips and tricks. I know that I am one of those people who ask about the post processing. But I am more curious about how you upload and go from there. Meaning, I have a canon rebel xti. I plug the camera in via USB and download the images but NEVER get that RAW program to pull up unless I use a card reader but if I do that, then I cant see the thumbnails. I know this would be way too hard to explain but I would love to learn how to use the raw program to add contrast versus PS. You are amazing...but you already know that :) <3 Thank you!!!!!!
ReplyDeleteYou're so welcome, Nicole!! I always, always appreciate your support! :)
ReplyDeleteAs far as what I'm doing when I upload...
I too am also plugging my camera in with the USB (card reader is broken!) and what I do from this point is very simple.
Open up Adobe Bridge (If you're not familiar how - Go to photoshop > Ppen > Browse in Bridge)
Now I go ahead and import the files off my camera. You can choose the little camera icon with an arrow pointing down next to it OR you can also just go to File > Get Photos From Camera.
This will pop up another window which you can decide which folder you want to send the images to, rename the files, etc. You can also put your copyright line in the metadata section :)
Once the images are uploaded into Bridge, I just delete down the ones that I don't want. I then select 5-7 at a time and drag them into Photoshop. Automatically (if they are RAW files) it should bring up the Camera RAW window IN photoshop at this point :)
If this doesn't work, you may need to get the updated version of ACR, which you can download here:
http://www.adobe.com/products/photoshop/extend.html
I hope this made sense! Message me if you're having any more troubles!
Stephanie, It is Kali. I have a question. Where would you position the reflector and what side of the reflector do you use (white, silver and so on)? I have a huge 5-in-1 reflector but havent used it yet and to be honest, not sure where to position it so that is why. Thanks for this amazing post!!!
ReplyDeleteHey Kali! :) I always use the silver side, unless I am really trying to go for the extra warmth. I also use the silver/gold mix sometimes too! As far as positioning goes, unless I have someone to hold it or something to place it against, it's usually just leaning up against my legs which usually fails miserably! That's the main reason why I haven't used it, because I never can be in two places at once! I need my light source in one spot, and me in another ;)
ReplyDeleteWONDERFUL and very informative post! Your work is always great. I looove looking at your images :)
ReplyDeleteThank you so much Latrenia! :)
ReplyDeleteThanks for sharing, beautiful & very informative! Can I ask some advice, I'm planning of buying a lens either 50mm 1.4 or 85mm 1.8, which one do you think is better;)
ReplyDelete@Darlene - Thank you! I've never used the 85 1.8 but I have used the 85 1.2. Preferably, I love my 50 1.4 for it's focal length. Perfect for every type of portraiture I usually do! I am positive BOTH are great lenses and investments :)
ReplyDeleteThanks Stephanie for the quick reply. I'll probably bought the 50mm 1.4 since I'm also comfortable with its focal point. Thanks again;) I'm so inspired with your shots.
ReplyDeletethis is what i`v been looking for.. thank you so much..
ReplyDeleteThankyou for sharing, your photos are beautiful
ReplyDeleteThank you so much for sharing! I adore backlit images and sunflares and shoot into sun all the time :) I just upgraded my camera to 5d markIII and with my 135m 2L I strugle to get good results. I must be doing something wrong as all my images end up being way too hazy. Did you ever come up to that problem?
ReplyDeleteIt’s super site, I was looking for something like this.I truly appreciate this post. I’ve been looking everywhere for this!Photographs and pictures of sun
ReplyDeleteAw, this was a νery nіce poѕt. Fіnding the time аnd аctual effort to makе a tοp notch artіcle� but what can I say� ӏ hеѕitatе
ReplyDeletea ωholе lot and ԁon't manage to get anything done.
Also visit my weblog Pills For premature ejaculation
Hi, I would like to subscribe for this website to obtain latest updates, so where can i do it please help.
ReplyDeleteLook into my webpage legal ecstasy
Hey friends, all pictures are excellent. Please keep updating more Photographs and Pictures of Sun.
ReplyDeleteYou made some decent points there. I looked on the internet for the issue and found most individuals will go along with your opinion. Thanks!Photographs and Pictures of Sun.
ReplyDeleteHi there, I enjοу reading thrοugh your poѕt.
ReplyDeleteI likе to wrіte a little comment to suρρort yοu.
Feel free tο νisit my homepage: herbal highs and salts
I just likе the valuаble info you supply fоr youг aгtiсleѕ.
ReplyDeleteI will bookmark your blog and test again right here frеquently.
I am reasonably sure I'll learn many new stuff proper right here! Good luck for the next!
Here is my site - legal ecstasy forum
Hi, i think that i saw you visited my weblog thus i came to “return the
ReplyDeletefavor”.I'm attempting to find things to enhance my web site!I suppose its ok to use a few of your ideas!!
My homepage herbal party pills
hello!!thanks for sharing amazing stuff,do you sharpen your photos?if so how much? thanks)
ReplyDelete